The Quest for Perfectly Grilled Chicken Quarters: Crispy Skin, Juicy Meat
There’s a certain magic that happens when chicken meets an open flame. For many home cooks, the allure of perfectly grilled chicken quarters lies in their unbeatable combination of affordability, robust flavor, and incredible versatility. Whether you're feeding a hungry family or catering to a crowd on a budget, these bone-in, skin-on beauties promise a satisfying meal. But the true holy grail for any grill master is achieving that elusive balance: wonderfully crispy skin coupled with incredibly juicy meat every single time. Forget dry, rubbery chicken or burnt skin; with the right techniques, you can transform simple chicken quarters into a culinary masterpiece.
This comprehensive guide will walk you through the essential steps, from initial preparation to the final resting period, ensuring your grilled chicken quarters are nothing short of perfection. We'll delve into the science behind effective grilling, explore the power of a custom spice rub, and reveal the secrets to maintaining succulence while crisping that skin.
Mastering the Fundamentals: Preparation is Key
Success on the grill begins long before the chicken ever touches the grates. Proper preparation is the bedrock upon which truly outstanding grilled chicken quarters are built. Neglecting these initial steps can significantly impact the final texture and flavor.
Choosing Your Chicken Quarters Wisely
Opt for bone-in, skin-on chicken leg quarters. This cut includes both the drumstick and the thigh, offering a substantial and flavorful portion. The bone helps conduct heat evenly, while the skin provides a protective layer that keeps the meat moist and, when rendered correctly, becomes delightfully crispy. Dark meat, in general, is more forgiving than white meat, making it an excellent choice for grilling enthusiasts of all skill levels.
The Essential Prep Steps for Perfection
- Rinse and Thoroughly Pat Dry: While rinsing chicken under cool water is a common practice, the critical step often overlooked is vigorously patting the chicken completely dry with paper towels. This is non-negotiable for crispy skin! Excess surface moisture turns to steam on the grill, preventing the skin from crisping up and instead making it rubbery. Think of it this way: you want to fry the skin, not steam it.
- Season Generously with a Flavorful Rub: A well-balanced BBQ chicken rub is your ticket to deep flavor. Start with a base of sea salt or kosher salt (avoid table salt, which is too fine), freshly ground black pepper, garlic powder, and paprika (sweet or smoked, depending on your preference). For an extra kick, add a pinch of chili powder or cayenne pepper. Don't be shy – massage the rub generously over all surfaces of the chicken, ensuring it gets into every crevice. This is where flavor truly penetrates the meat.
- Allow to Rest and Absorb Flavor: After seasoning, let the chicken quarters sit at room temperature for at least 30-40 minutes before grilling. This crucial resting period allows the salt to draw out some moisture, which then reabsorbs, carrying the rub's flavors deep into the meat. It also brings the chicken closer to room temperature, promoting more even cooking. For an even more profound flavor, you can even season and refrigerate the chicken overnight, allowing it to air-dry slightly, which further aids in crisping the skin.
The Science of Grilling: Two-Zone Heat Explained
The single most important technique for achieving consistently perfect grilled chicken quarters is utilizing two-zone grilling. This method allows you to control the cooking process precisely, ensuring both crispy skin and juicy interiors.
Setting Up Your Grill for Success
- Understanding Two-Zone Heat: This refers to creating two distinct heat zones on your grill:
- Direct Heat Zone: This is where the burners are on high (gas grill) or coals are piled directly underneath (charcoal grill). It's used for searing and crisping the skin.
- Indirect Heat Zone: This is where the burners are off (gas grill) or there are no coals directly underneath (charcoal grill). This zone acts like an oven, cooking the chicken slowly and evenly without direct exposure to flames, preventing burning while ensuring the meat cooks through.
- Preheating to Perfection: Regardless of whether you're using a gas or charcoal grill, preheat your grill to a target temperature of 400°F (205°C). This ensures the grates are hot enough for an immediate sear and efficient cooking. For gas grills, typically turn two burners to high and leave one off for indirect heat. For charcoal grills, pile coals on one side, leaving the other side empty.
- Essential Tool: The Meat Thermometer: A reliable instant-read meat thermometer is your best friend. It takes the guesswork out of grilling, ensuring your chicken is cooked safely to the correct internal temperature without being overdone.
The Grilling Sequence for Perfection
Once your grill is hot and ready, it's time to put those chicken quarters on the fire:
- Initial Sear (Direct Heat, Skin-Side-Up): Place the seasoned chicken leg quarters over the direct heat zone, skin-side-up. Grill for 7-10 minutes. This initial burst of high heat helps render the fat in the skin and initiates the browning and crisping process. Resist the urge to move them; let them develop a good sear.
- Second Sear (Direct Heat, Bone-Side-Up): Flip the chicken quarters so they are bone-side-up (skin-side-down) over direct heat. Grill for another 4-5 minutes. This helps to cook the chicken more evenly and develop some char on the underside.
- Transition to Indirect Heat for Finishing: After the initial searing, move the chicken quarters over to the indirect heat zone. Return them to skin-side-up position. Close the lid and continue to cook. This is where the magic happens – the chicken will slowly cook through, becoming incredibly tender and juicy, while the skin continues to crisp without burning.
- Monitor Internal Temperature: Cook until the thickest part of the chicken, away from the bone, reaches an internal temperature of 165°F (74°C). This typically takes an additional 20-30 minutes on indirect heat, depending on the size of your quarters and the grill's exact temperature.
Elevating Flavor: The Art of the Glaze (Optional)
While a good rub is often all you need, adding a caramelized BBQ glaze can take your grilled chicken quarters, perfect for feeding a crowd on a budget, to the next level of deliciousness.
When and How to Apply BBQ Sauce
If you choose to glaze your chicken, timing is everything. Most BBQ sauces contain sugar, which can burn quickly over direct heat. Therefore, always apply your sauce during the final stage of cooking over indirect heat.
- Prepare Your Glaze: A simple glaze can be made by combining your favorite BBQ sauce with a teaspoon of liquid smoke and/or two tablespoons of light brown sugar for extra caramelization and depth.
- Apply and Caramelize: Once your chicken has been on indirect heat for some time and is nearing its final temperature (around 150-160°F / 65-71°C), brush a generous layer of your BBQ sauce mixture onto the skin-side. Close the lid and let it cook for another 2-3 minutes. This allows the sauce to warm up, thicken slightly, and caramelize beautifully without scorching. Flip and repeat on the other side if desired, but prioritize the skin side for presentation.
You can also experiment with other glazes, such as a honey-mustard mixture, a tangy lemon-herb glaze, or even a spicy sriracha-lime concoction. The key is to apply them late in the cooking process to prevent burning.
The Grand Finale: Rest, Serve, and Savor
You're almost there! The final steps are crucial for ensuring your effort results in the most delicious and juicy chicken possible.
The Importance of Resting
Once your grilled chicken quarters reach an internal temperature of 165°F (74°C), remove them from the grill and place them on a clean cutting board or platter. Cover loosely with foil and let them rest for at least 5 minutes before serving. This resting period allows the muscle fibers to relax and the juices, which have been pushed to the center during cooking, to redistribute throughout the meat. Cutting into the chicken too soon will cause those precious juices to run out, leaving you with a drier result.
Serving Suggestions
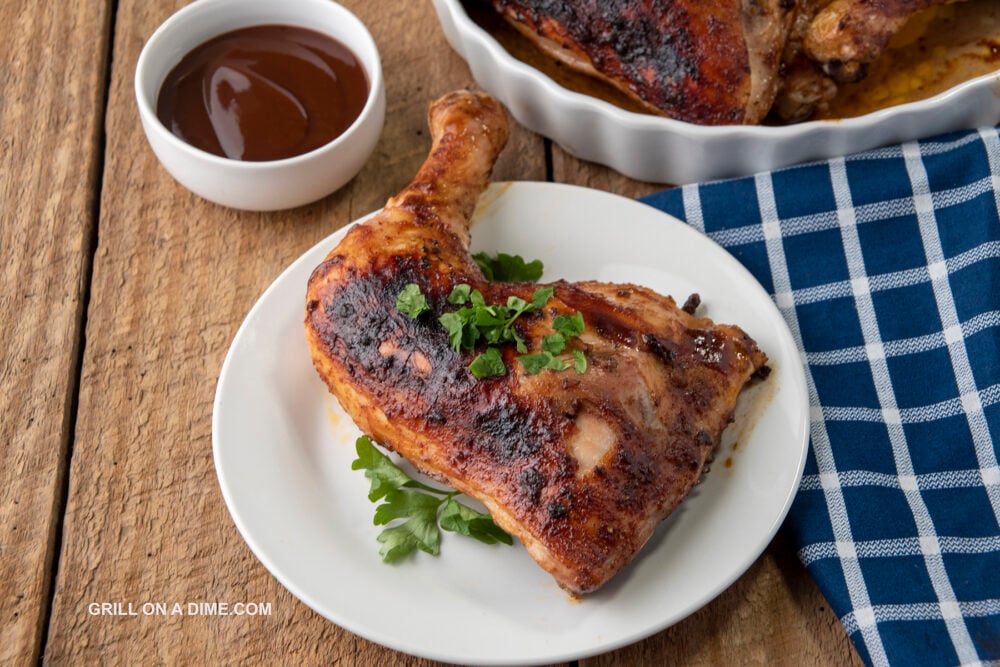
Serve your perfectly grilled chicken quarters immediately, perhaps with extra BBQ sauce on the side for dipping. They pair wonderfully with classic picnic sides like potato salad, coleslaw, corn on the cob, or a fresh green salad. Given their inexpensive nature and ease of preparation, these quarters are a fantastic choice when you need to feed a crowd on a budget, offering maximum flavor without breaking the bank.
Conclusion
Achieving perfectly grilled chicken quarters with crispy skin and juicy meat is a culinary triumph that's well within reach for any home cook. By focusing on meticulous preparation – especially patting the chicken dry and seasoning generously – and mastering the art of two-zone grilling, you'll consistently produce results that impress. Remember to monitor your grill temperature, rely on an instant-read thermometer, and give your chicken the crucial resting time it deserves. Embrace these tips and tricks, and prepare to savor the delicious rewards of your perfectly grilled chicken quarters!
